


The Complete Solo Setup Guide for Stryker Boats
- Brian Cummings
At Stryker Boats, we believe in making adventure accessible—on your terms, your schedule, and your own two hands. Our inflatable boats are designed with solo adventurers in mind, whether you’re gliding across a glassy lake at sunrise or navigating hidden inlets along a remote coastline. With durable construction, intuitive assembly, and thoughtful design features, going solo doesn’t mean going without. It means going with confidence.
Of course, setting up an inflatable boat alone—especially a large, professional-grade model like the Stryker HD 470—can feel overwhelming the first time. But like any good adventure, it begins with preparation, builds with practice, and rewards you with freedom. That’s where this guide comes in.
We’ve laid out the process step by step to help you feel confident and capable from the moment you unroll your boat to the moment you hit the water.
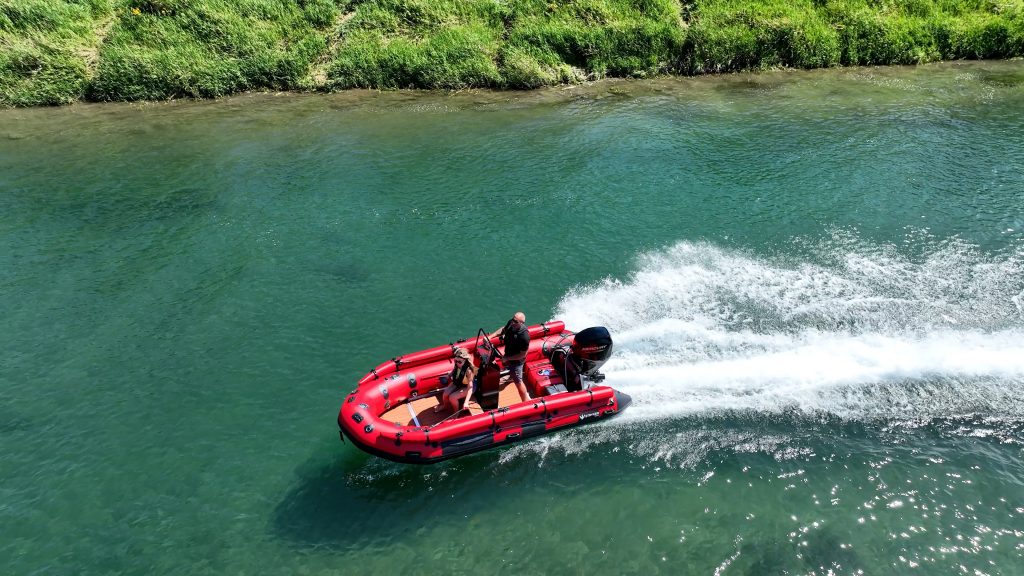
Going Solo? Watch Me Set Up a 15 foot Stryker Boat Alone!
Chapter 1: The mindset and the mission
Solo boating isn’t just a logistical choice—it’s a mindset. It’s about taking full ownership of the experience. Many Stryker owners are drawn to the peace and quiet of solo fishing, the meditative rhythm of paddling alone, or the sense of accomplishment that comes with mastering a skill completely on your own. Our boats are designed to support that independence. The lightweight aluminum construction, durable marine-grade PVC, and modular floor systems make even our largest models manageable by one person.
Before anything else, it’s important to get familiar with your specific boat model. Whether you’re working with the LX series, the heavy-duty HD line, or the high-performance PRO models, each boat comes with slightly different specifications. Understanding the number of air chambers, the layout of the transom, the type of floor, and recommended PSI levels will save time and help you avoid costly mistakes.
Another key early step is choosing your setup site wisely. A flat, clean surface is essential—something like compact grass, a smooth sandy shoreline, or a dockside pad. Avoid rough gravel, hot pavement, or sharp stones. You’ll want enough room to fully unroll the boat and access all sides comfortably.
Safety should never be an afterthought. Before you begin, inspect your equipment—check that valves, seams, and the pump are all in good condition. Wear gloves if you’re handling aluminum components, and never inflate your boat in direct sunlight or near open flames. Patience here pays off on the water later.
Chapter 2: Get your tools in order
A smooth solo setup starts with preparation. Gather everything you’ll need in advance and lay it out in the order you’ll use it. Keep your boat in its carry bag until you’re ready to unroll, and make sure your pump—manual or electric—is fully functional with the correct fittings. You’ll also need your boat floor (air deck or aluminum panels), the transom if it’s removable, a small toolkit for minor adjustments, and your outboard motor if you’re using one. It helps to treat this step like packing for a hike: if you lay your gear out methodically, you avoid delays and last-minute surprises.
Chapter 3: Unroll with purpose
Once you’re at your launch site, unroll the boat slowly and deliberately. Make sure the transom end is facing the water so you won’t need to rotate the entire boat later. As you unroll from stern to bow, smooth out folds and check that the boat is lying flat and free of twists. If it’s a windy day, weigh down one end with a dry bag or gear to stop the boat from shifting. Take your time here. This is the foundation for everything that follows.
Chapter 4: Inflate in stages, not all at once
Start inflating the main air chambers beginning at the stern. Add air in gradual, even stages—about 50 to 60 percent inflation is ideal for the first pass. This allows the material to stretch evenly and helps align everything before full pressure is applied. As you inflate, monitor the pressure using a gauge and keep an eye on the shape of the boat. Overinflating early on can cause stress at seams and make the floor installation difficult.
Once the tubes are partially filled and the structure is starting to take shape, insert the floor. Whether you’re using an air deck or aluminum panels, installing the floor at this stage is easier because the tubes are still flexible. After the floor is in place and aligned correctly, you can return to finish inflating each chamber to full pressure. The keel should always be inflated last—it helps form the boat’s signature shape and enhances its tracking and stability in the water.
Chapter 5: Install the floor securely
If your model uses a high-pressure air floor, it will roll out easily and align with the pre-positioned valves. Inflate it to the pressure recommended in your manual—typically around 8 to 11 PSI. You’ll feel it become very firm once it’s fully inflated, almost like a solid surface.
For aluminum panels, the process requires a bit more care. Start at the rear and work forward. Slide the first panel under the side tubes, then connect the middle and front panels one by one. Use the provided stringers to lock everything in place. The fit should be snug but not forced—if you’re struggling, check that the tubes aren’t overinflated and try applying a bit of marine-grade grease to the panel edges.
Chapter 6: Attach the transom and accessories
If your boat has a removable transom, now’s the time to install it. Line up the mounting holes, insert the bolts, and tighten them carefully, using washers to ensure a watertight seal. Once the transom is secure, add any optional accessories such as your bench seat, rod holders, bimini mounts, or navigation lights. Installing accessories before the boat is on water helps with balance and safety, and keeps your workflow efficient.
Chapter 7: Mount the motor with care
Attaching an outboard motor solo takes strength and focus. Make sure you’re lifting with proper technique—keep your back straight and use your legs. Once the motor is positioned over the transom, tighten the mounting clamps evenly on both sides. Check that the propeller clears the floor and that the motor is seated firmly.
Before connecting the fuel system, inspect the hose and primer bulb for cracks or stiffness. Connect everything, give the primer a few squeezes, and check for leaks. Lastly, clip the safety lanyard to your belt or life jacket. It’s a small step, but one that could save your life in an emergency.
Chapter 8: Launch smart and steady
When launching alone, technique matters more than strength. If you’re launching from a shoreline, use inflatable rollers or a boat dolly to reduce friction and save effort. Tilt the motor up to avoid dragging it and guide the boat slowly into the water using both hands or a tow strap.
At a dock, secure the boat with lines, then lower it into the water in a controlled way. Enter from a seated position to keep your weight low and balanced. If you’re launching from a trailer, back it in gradually, float the boat off gently, and use dock lines to guide it into position.
The goal isn’t speed—it’s control. The more deliberate you are, the easier it becomes over time.
Chapter 9: Last-minute safety checks
Before heading off, take a few minutes to walk around the boat. Check the air chambers for firmness and look for any signs of softening. Re-tighten the transom bolts and check that the throttle, gear shift, and steering operate smoothly. Test your motor at idle speed and make sure it responds well to input.
Distribute your gear evenly to prevent leaning or drag. Make sure nothing can shift or roll. And, of course, always wear your PFD and clip your kill switch lanyard in place.
Chapter 10: Aftercare and smart storage
A successful solo trip doesn’t end at shore. Rinse your boat with fresh water—especially if you’ve been in saltwater—then dry the surfaces with a towel to prevent mildew or UV damage. Look for any signs of wear or abrasion. A quick inspection after every use makes long-term maintenance much easier.
Apply UV protectant every few trips and store your boat in a cool, dry place out of direct sunlight. If space is tight, you can deflate it partially, roll it loosely, and store it in its carry bag. Avoid folding along the same creases every time, as this can cause wear.
Chapter 11: Troubleshooting common issues
If your boat doesn’t inflate properly, check that all valves are fully open and seated correctly. If you hear a slow hiss or lose pressure quickly, use soapy water to find leaks and check the condition of O-rings.
Struggling with tight-fitting floor panels? Try releasing a bit of air from the main tubes before reinserting them. Motor won’t start? Revisit the basics—check fuel flow, inspect the spark plug, and ensure any electric-start batteries are charged.
If the boat feels unstable or leans to one side, redistribute your gear or check the air pressure in each chamber. Small adjustments make a big difference on the water.
Go solo with confidence
At Stryker Boats, we don’t just build inflatable boats—we build confidence. Every model is crafted to empower independent adventurers who want to explore the water on their own terms. With the right tools, a bit of patience, and a few practice runs, you’ll find that setting up your boat solo becomes second nature.
Your first solo setup might take a little time. But by your third or fourth, you’ll be moving with the rhythm and confidence of someone who knows exactly what they’re doing.
So here’s to your next solo journey. Go far. Go free. Go Stryker strong.