
USD


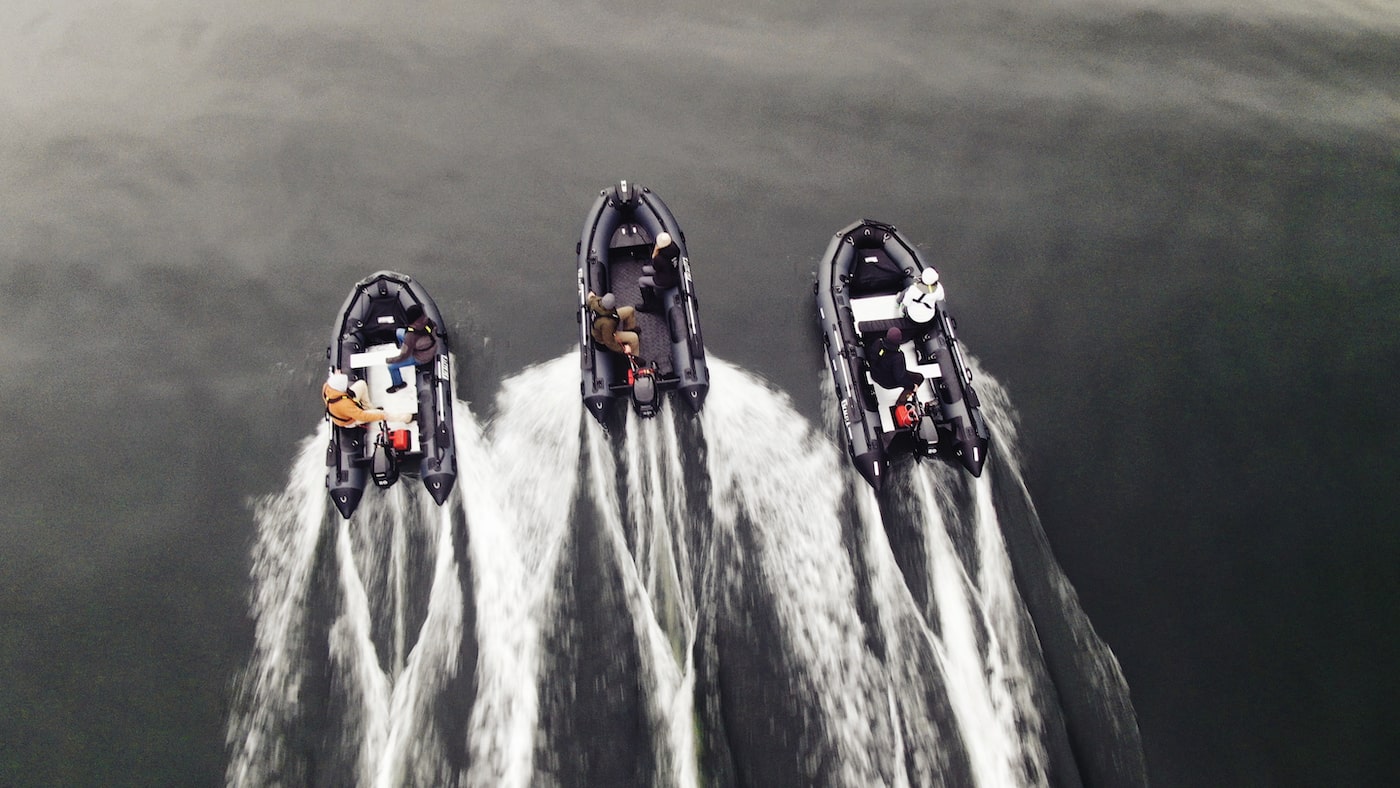
Thank you for your purchase of a Stryker inflatable boat! Our showroom and office is located in Aldergrove, BC, Canada. We strive to bring the very best premium inflatable boats to our customers. We saw an area of the market that was lacking and decided that we could bring something special. Our goal is to deliver a rugged, tough and comprehensive inflatable boat. We pride ourselves in exemplary customer service.
We have included information on how to assemble disassemble & care for your new Stryker boat. Written instructions and link to our instructional videos on our Stryker Boats YouTube channel.
How To Assemble Your Stryker Video
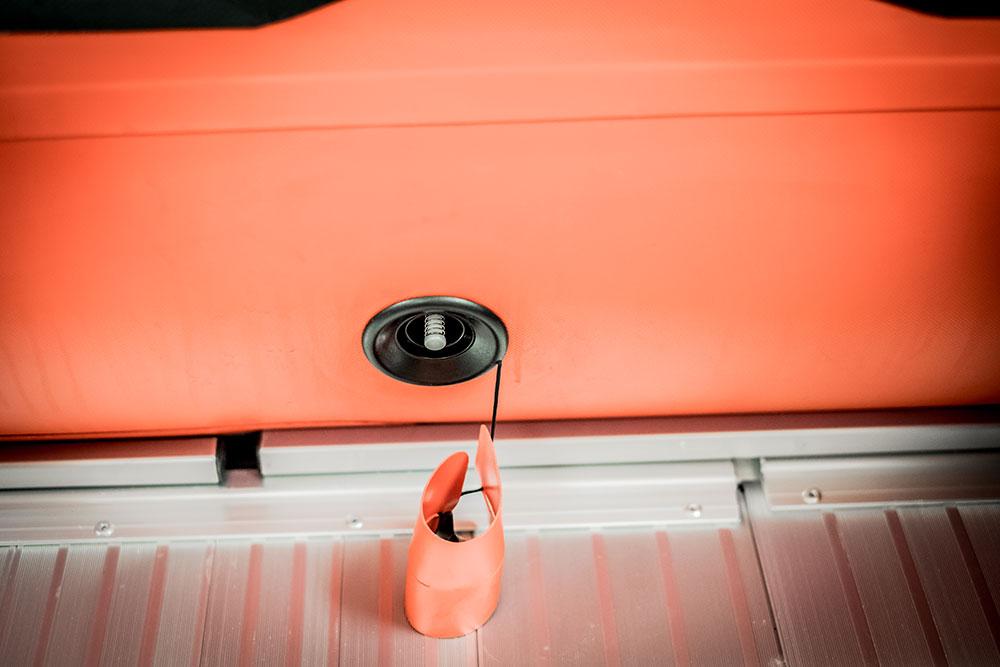
Locate inflation valves in chambers (3 for LX, 5 for HD & PRO)
Put valves in the ‘closed’ position prior to inflation. They are closed when the pin is in the up position.
For first time assembly only: Inflate your boat to 100% for 2 – 4 hours without the floor and let it sit. This works best in a warmer environment. This will help stretch out the fabric and will allow the floor to be installed easier the first time. You can skip this step if this boat has been used before. Deflate to 20% when ready to install the floor.
Inflate boat to approximately 20% (This will give your boat a shape). You can do this with either the foot pump supplied or optional electric pump.
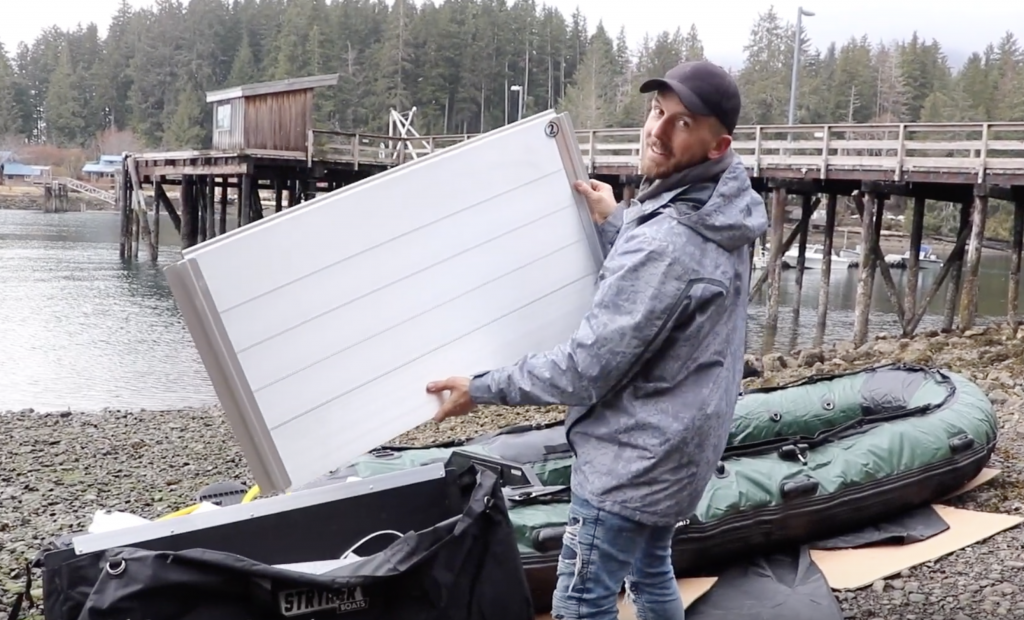
How To Install Your Floor Video
Advanced Flooring Stabilization System Video
Place bench seats into fabric holders.
NOTE: It is not necessary to install bench seats if you prefer to run the boat without.
Inflate the main tubes the rest of the way (3.6PSI). Install oars making sure to screw the caps on tight, so oars in the water. Install all the bags and cover valves with protectors.
NOTE: Inflate the main compartments in a 2 or 3 step sequence. If you fully inflate one main compartment when the others are empty you may damage the internal baffles that separate the compartments.
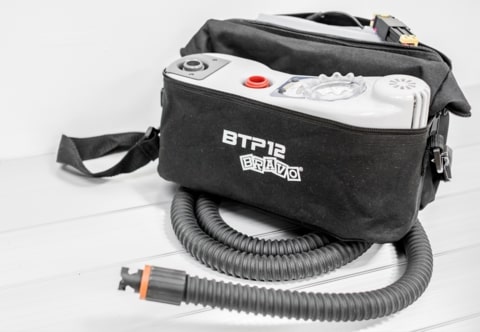
NOTE: Our Bravo electric pump is designed with an automatic shutoff when set to correct pressure. If you are using the supplied foot pump, it is designed to go up to just 4 PSI. If you are unsure of how much pressure is in the tubes just keep pumping until you can’t pump anymore. When in doubt, pump it up.
The keel is the last air chamber to be inflated (4PSI)
NOTE: We do not recommend going inside the boat with the keel inflated on ground. This could potentially damage your boat.
It is not recommended that you use an air compressor to inflate your boat. Air compressors are designed for a very high pressure and you could easily damage your boat. If you are using an electric pump you already own (purchased elsewhere) this will help put majority of the air into the tubes however will not get it up to full pressure. Finish the boat up with supplied foot pump.
If you find your boat isn’t planing properly or seems too ‘flexible’ it is possible your boat is under inflated.
If you find you are losing air pressure in the tubes you may wish to take the valve tool (inside the repair kit) to tighten all the valves.
The keel is the last air chamber to be inflated (4PSI)
NOTE: We do not recommend going inside the boat with the keel inflated on ground. This could potentially damage your boat.
Main Tubes: 3.6PSI
Inflatable Keel: 4.0PSI
Airmat Floor: 10 PSI
It is not recommended that you use an air compressor to inflate your boat. Air compressors are designed for a very high pressure and you could easily damage your boat. If you are using an electric pump you already own (purchased elsewhere) this will help put majority of the air into the tubes however will not get it up to full pressure. Finish the boat up with supplied foot pump.
1. Inflate the bow chamber to 1psi
2. Inflate the side chambers to 1psi
3. Inflate the bow to 3.6 psi
4. Inflate the side chambers to 3.6 psi
5. The final step is inflate your keel to 3.6 psi. You can take the keel as high as 5psi if desired. Be sure to turn your pump down immediately after ( if using electric) to ensure you don’t overinflate your tubes the next time you use it.
This is so the baffles in the tubes are pushed towards the back of the boat. As the air warms up throughout the day the overinflation valve in the bow will release the excess pressure. The baffles will move towards the bow and make room for the added pressure from warm air the side chambers.
If you find your boat isn’t planing properly or seems too ‘flexible’ it is possible your boat is under inflated.
If you find you are losing air pressure in the tubes you may wish to take the valve tool (inside the repair kit) to tighten all the valves.
The keel is the last air chamber to be inflated (5PSI)
NOTE: We do not recommend going inside the boat with the keel inflated on ground. This could potentially damage your boat.
How To Disassemble Your Stryker Video

Open all the air chambers.
NOTE: Be sure to screw the cap back onto the oar locks so that the sharp edges do not damage the fabric
Keep your boat free of dirt, debris & grime (take care of your stuff and it’ll take care of you)
If you keep your boat in the water, regularly check the bottom for excessive build-up of marine life.
This is the number one enemy of PVC inflatable boats. Since your new Stryker is a sizeable investment it is important that you protect it from the sun. This is not a concern for those of you who wish to inflate your boat for a weekend of use or while on vacation but if you plan on leaving your boat inflated outside whether it be at the end of a dock or on your sailboat all summer this is an important realization.
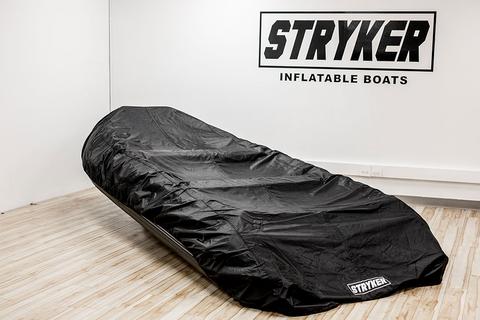
We recommend covering your boat when not in use for time. We realize it is not practical and pretty inconvenient to cover the boat every time you get in and out but if it will be left out in the elements for several days it is highly advisable to cover it.
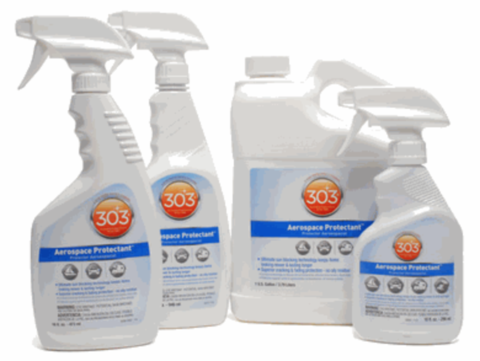
We also recommend applying 303 Aerospace Protectant to your boat. This is a very effective product but must be reapplied periodically. Think of this as a sunscreen for your boat.
30% air loss is normal over a 2 week period. Air loss will be dependent on ambient temperatures. Example: if you inflate your boat on a cold morning the air will expand and the anti over inflation valve will go to work. Same for the opposite. If you inflate your boat on a very warm day, it will lose some air overnight if temperatures drop considerably.
NOTE: Should you notice more air loss than this it is advisable to find the valve key in your repair kit and tighten up all valves. If you’re still noticing significant air loss your boat may have a leak/hole. You can check for these by spraying soapy water around suspected areas.
NOTE: To find tiny leaks, take floor boards out, inflate boat hard. Put some liquid detergent in a bucket of water and with rag or big wash brush, scrub it all over boat. Keep watch for elusive, tiny bubbles. When you find the first leak, keep looking. You might as well fix them all at the same time! Remember, the number one cause of slow leaks is a poorly seated valve. Unscrew, clean. Make sure little rubber O-rings are good. They are the cheapest repair possible.
Fully deflate your boat. Use the valve tool supplied in your repair kit to unscrew the outer portion of the valve. There is a female end of the valve on the inside of tube. Make sure you hold this otherwise you will have to find it. Not impossible, but annoying. Once you have unscrewed the outer portion you can replace it with your new valve. Valves can be purchased online.
Small repairs and the addition of small accessories may be attempted by the owner if factory gluing instructions are followed closely.
Rips or holes larger than one inch in the air chambers or within two inches of a seam should be repaired with internal and external patches by a professional repair technician at a certified repair facility. Our local authorized repair facility is available should you be unsure of how to fix this yourself.
Greelys Inflatable Boat Repair (Langley, BC) – 604-514-9975
MEK (methyl ethyl ketone). It is often available at paint, hardware or plumbing stores, sold as a cleaner for PVC pipes or lacquer thinner. For non-critical bonds you might substitute acetone.
Your boat came equipped with a tube of one part PVC glue in the repair kit. This glue will work well for very small holes (pin holes) but for larger holes or seams you should use two part PVC glue. Do not use glue that is not specifically intended for PVC fabric. Hypalon glue will not bond properly with PVC.
Humidity must be less than 70%.
Do not glue in direct sunlight. Temperature should be between 64 and 77 degrees F.
Gather rags, glue brush; solvent; timer with second hand or stop watch; make sure all the old glue is cleaned off; get your patch cut out, position noted and marked. It always leaves a neat tidy finish if you tape off the perimeter of the patch area with masking tape to avoid over glue.
If using a 2 part glue, mix accelerator and glue thoroughly either now or while waiting between the solvent wipes below. Accelerator is toxic; keep off skin. Keep mixed glue covered (foil or wax paper) when not using. Pot life is about 1 hour. It may still look liquid, but will have lost effectiveness.
(3 times – to prepare the fabric for a chemical bond with the glue)
Scrub both sides (boat and patch or accessory) with MEK on a rag to clean surface. Be careful not to wipe the MEK on areas of the boat or patch that will be seen as MEK will make the fabric sticky and shiny. Use masking tape around the perimeter to minimize this. Wait 5 minutes after the first MEK wash. (time it)
Apply two more solvent wipes with 5 minute waiting time (timed) between them.
You are preparing the fabric for glue adhesion. Abrading these PVC fabrics is not recommended or necessary.
NOTE: Bond strength drops very rapidly with heat or high humidity. Take your boat indoors. Don’t even think about trying to glue on the dock or near the water or in direct sunlight. Professionals use a specially built, climate controlled room, and still don’t attempt to work on a rainy day.
NOTE: (when using a 2 part PVC glue – Sta-Bond or Clifton Adhesive): The solvents in the glue must evaporate before assembly. When ready to assemble parts, the glue must not be tacky at all to the finger. It must not have spots of whitish glaze. If so, you may have spread the glue too thick, not waited long enough between coats, or a sudden drop in temperature or gust of humid air may have occurred. Someone may have opened the door, or you may have leaned too close and breathed on it. Plan to stay in the room until finished.
NOTE: If using small cans (1/4 L) mix the entire can with the dose of accelerator. Inaccurate measurement will weaken the glue. Once opened the accelerator cannot be kept. Do not try to save it. The quality of your final bond depends on it.
NOTE: Apply glue with a paint or glue brush with the bristles cut short (1/2 to 3/4″) so they are stiff. It must be natural hair (i.e. OK for lacquer); bound in metal not plastic; preferably with wooden or metal handle. Careful not to get glue on areas of your boat besides the repair area.
NOTE: Old glue must be completely removed — solvent, sandpaper, scraping, grinding with a Dremel tool. Glue will not stick to old glue. Clean it off thoroughly. Be careful not to burn or melt the fabric if using a Dremel tool. Constant motion with the tool will prevent this problem.
NOTE: If your boat has ever been protected with ArmorAll® or another silicone or petroleum based product, you may have great difficulty getting a bond. Wipe the repair area well with MEK, follow the gluing instructions closely and hope for the best.
If patching, cut patches 1 to 2 ” larger than tear in each direction and round the corners (a quarter makes a good template for the edges). Little one inch circles pasted over a pin hole won’t last. Try to get the same fabric used by the manufacturer for your boat. The inside and outside surface may be different. If you can’t match color, sometimes a cleverly shaped patch in contrasting color can be made to look like decoration instead of a Band-Aid. e.g. arrow, lightning bolt, even a new D ring if in right spot. Professionals often put one on each side to look like they came with the boat.
Inflate boat to apply accessories. Deflate to patch air leaks, even if very small. Air pressure will bubble the patch before glue sets.
You can use the steps above provided. Some glues recommended are Sta-Bond or Clifton Adhesive.
This can damage the fabric of your inflatable boat. Take time to clean up fuel spills promptly if they happen to occur.
If you are using a davit system you should position your boat so that it will not be subjected directly to exhaust fumes.
Store boat in bags in a dry location.
You are welcome to store the boat fully inflated if you have the space. Deflation is not necessary.
The boat should be stored cleaned and dried. If the boat is stored wet and subjected to freezing temperatures while in storage, the freezing and thawing of the water can damage the fabric.
Do not use Armor All on your boat. Or any other product that contains silicone on your inflatable boat. Applying Armor All will make it extremely difficult to patch if you should ever have a puncture or tear. Even years later it would still be difficult to successfully apply any patch. Always check labels that the product you intend to use is safe for use on PVC fabric. When in doubt you can call the manufacturer of the product. Remember that these products should not have silicone.